A hardwood floor gathers the life of a home in small marks.
A suitcase rolls through the foyer. A chair leg loses its felt pad. A dog slides in celebration. In February the light turns low and blue. Salt and grit arrive with every step. This is when a “touch-up kit” on a store shelf whispers promises. Pens, putties, and wax sticks claim fast fixes. For most homeowners without hands-on hardwood experience, those kits do not deliver. They stain skin and microfiber pads. They leave shiny slugs on matte finishes. They might hide the problem for a week but these kits are not reliable and can make your floor look even worse.
This is your clear, winter-specific guide to why kits disappoint, what damage truly requires, and how to keep a refined, refinish-ready floor without the detour.
Proofpoint. Royal Hardwood Floors is Ottawa’s only third-generation hardwood specialist. Since 1922 our family has restored and protected floors in residences and heritage homes across the National Capital Region. We see the outcomes of DIY kits every winter. We also know the simple, professional paths that last.
I. Why kits fail in winter conditions
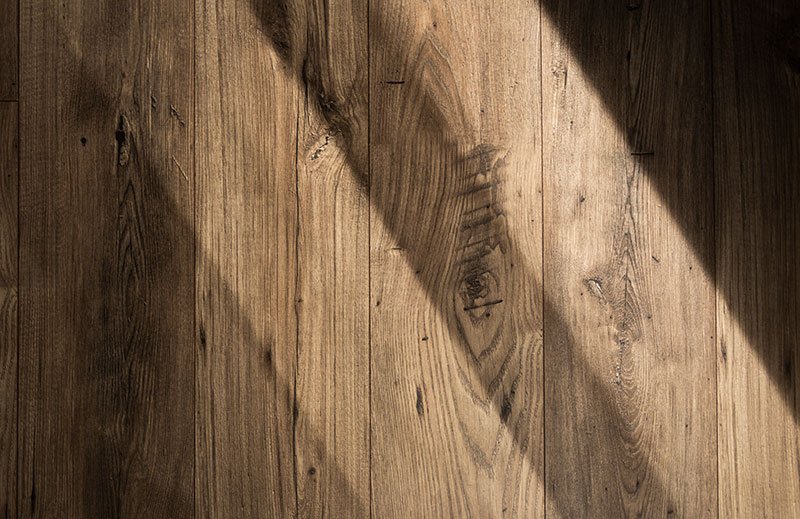
Winter lighting exposes every mismatch. Ottawa’s low sun and snow glare amplify sheen and color errors. A pen that looked close at night reads wrong by 3 p.m.
Dry air opens seams. At 30 to 40 percent indoor RH, micro-gaps widen. Marker dye and soft wax fall into edges, haze the joint, and are impossible to remove evenly.
Salt and grit bind to soft films. Kit waxes and polishes grab winter residue. The mark returns with a gray halo that looks dirtier than before.
Technique matters more than the tools. Pros tune color in layers, correct sheen, and protect the repair under a bonded finish. Kits skip those steps and ask you to color raw wood without rebuilding the film that keeps water out.
Bottom line. Kits are designed for perception, not protection. In winter, your floor needs protection first.
II. The two questions that decide repair, not the kit aisle
- Is the finish film broken. If you can feel wood fiber with a fingernail, the barrier is breached. Color alone will not stop moisture or future dirt.
- Is the damage localized or structural. A single hairline on intact film can be blended. A dent, a white edge at a seam, or a wide abrasion requires a bonded repair or board replacement.
If you cannot answer both with confidence, stop. Incorrect kit use often doubles the final cost.
III. Common kit mistakes we correct every week
- Wrong color family. A warm greige on white oak is not “brown plus black.” Many Ottawa floors use neutralizing toners that kits cannot match.
- Sheen mismatch. Most pens dry shiny. On matte floors the repair flashes at every angle.
- Flooded bevels. Edge stain bleeds along the V and telegraphs a dark outline around each board.
- Soft wax in traffic. Putty smears under chairs and collects grit.
- Over-cleaning after. Ammonia or vinegar washes intended to “blend” only etch finish and lock in haze.
These are not failures of effort. They are predictable outcomes of the wrong method.
IV. What actually works for homeowners in winter
You do not need a kit. You need a simple, protective sequence that respects the finish.
1) Stabilize the environment. Hold indoor humidity near 35 to 45 percent. Gaps stay fine. Colors read true.
2) Control grit at the door. Exterior scraper mat. Interior flat-weave rug on a felt and natural rubber pad sized to two strides. Shake weekly.
3) Prevent repeat damage. Industrial wool felt pads under chairs, 5 millimeters thick. Replace when glossy. Trim pet claws every two to four weeks.
4) Clean for clarity. Neutral pH hardwood cleaner on a barely damp pad, then dry to zero. No steam, no oil soaps, no “glow” products.
5) Choose the right professional repair.
- Screen and recoat. Best when many light scratches create a dull lane. Light abrasion. One new satin or matte coat. Sheen unified. Protection restored in a day.
- Localized sand, tone, and coat. For a single wide scratch, a dent with lifted finish, or edge whitening. We feather the zone, rebuild color, and lock it under a bonded film so winter moisture cannot return.
- Board replacement. Fast and honest when tongues are crushed, edges fragment, or dark water marks run deep. We weave the new board into pattern and finish it to read original.
Each path restores the barrier. Color then lives under protection, not on top of it.
V. Real-world scenarios and the right move
Scenario A. Hairline on matte white oak in front of south glass.
Do not use a glossy pen. Schedule a screen and recoat of the room. Your single line vanishes inside a unified matte film, and the low sun stops catching scattered micro-scratches.
Scenario B. Shallow gouge in a prefinished bevel at the kitchen island.
Skip soft wax. We micro-sand the bevel, tone with controlled color, seal the edge, and blend into a maintenance recoat of the kitchen. The joint stays clean through winter mopping.
Scenario C. Quarter-sized dent in heritage maple by the stair.
No pen can raise crushed fibers. We patch with a localized sand and tone or replace the plank if fiber damage is deep. The stair remains safe and period correct.
Scenario D. White halo at seams after a spilled slush puddle.
That is moisture intrusion under lifted film. Color on top will not bond. We dry, feather, re-bond, and recoat before the mark darkens.
VI. Why sheen matching defeats DIY kits
Color gets all the attention. Sheen tells on you. In Ottawa’s raking winter light a shiny patch on matte film flashes from across the room. A dull patch on low satin reads like a bruise. Pros set sheen with the finish system itself, not with an afterthought pen. That is the difference between “where is it” and “there it is.”
VII. The cost truth
A box of pens looks inexpensive until it forces a full sand later. Wax contamination prevents adhesion. Edge flooding requires aggressive stripping. A disciplined screen and recoat today is usually a fraction of a future full refinish caused by a well-meant kit.
VIII. A quick decision map you can trust
- You see finish intact and a faint hairline. Live with it until your next scheduled recoat. The recoat will erase it cleanly.
- You feel wood or see white at a seam. Call us. The protective film must be rebuilt before winter moisture cycles it worse.
- You have many light scratches through a corridor. Book a screen and recoat. One day. Low odor. Unified sheen.
- You see dents or dark stains. Plan a localized repair or board replacement. It is faster and looks better than dabbing color.
Touch-Up Kit Reality Check: 10 Things to Assess Before You Ruin Your Floor
Use this checklist to decide whether you need a pro — or if the mark can safely wait until your next recoat.
- Is the finish film intact? If you can feel wood fibers with a fingernail, stop. This needs a bonded repair.
- Is the damage truly surface-level? A faint hairline on intact film can often wait until your next recoat.
- Is the colour warm, neutral, or greige? Touch-up pens rarely match Ottawa neutrals with toners. Mismatch = guaranteed flash.
- Does your floor have a matte sheen? Pens dry shiny. Matte + shiny = visible from across the room.
- Are there micro-gaps from dry winter air? Marker dye and wax fall into seams and haze the joint.
- Is there salt or grit in the area? Soft wax grabs grit and makes the spot dirtier over time.
- Is the mark in a traffic zone? Kitchen, foyer, hallway = wax will smear immediately.
- Is there edge whitening at seams? That’s moisture under lifted finish. Kits cannot bond this.
- Is the floor dark-stained? Dark tones magnify halos and residue. DIY repairs almost always show.
- Do you have a recoat scheduled within 24–36 months? Waiting for a professional screen & recoat is almost always cheaper and cleaner.
FAQs
Do touch-up kits ever make sense?
Only for pros using them under a new coat or for staged photography. For homeowners in winter light, they usually create shiny, dirty-looking patches and make the floor look worse.
Can I use a marker until I recoat in spring?
Avoid it. Markers contaminate the surface and can block adhesion during a future recoat. Keep the area clean and schedule a screen and recoat instead.
What if my floor is very dark?
Dark stains magnify halos and residue. DIY color almost always shows in low winter sun. A professional localized repair or recoat is the better path.
Will a kit fix edge whitening?
No. Edge whitening is lifted finish and moisture intrusion. It requires a bonded repair and often a localized tone and seal—not ink or wax.
How often should I recoat?
Every 24 to 36 months in active homes, sooner in heavy traffic corridors. Recoating on rhythm prevents scratches from becoming deep damage and removes the temptation to reach for a kit.
Book an honest repair assessment
Skip the kit. Book a free quotation. We will inspect the marks in winter light, confirm where finish is breached, and propose the right solution. That may be a fast screen and recoat, a precise localized repair, or a discreet board replacement. The result is a calm, elegant floor that stays refinish-ready for years.
Serving Ottawa since 1922 as the only third-generation hardwood specialist in the region.