A Quiet Masterclass In Finishing The Floor
60 Second Summary For Ottawa Homeowners
Who this is for
Ottawa homeowners planning renovations or new installs who want every doorway and room change to feel seamless, safe and elegant, without chips, toe stubs or seasonal squeaks.
What you will learn
• How to measure finished heights and pick the right profile
• When to use flush reducers, T molds, thresholds and saddles
• How to preserve expansion space while keeping doorways beautiful
Result
Transitions that disappear to the eye, feel smooth underfoot and keep your hardwood free to move through Ottawa’s seasons without damage.
Key Facts For Ottawa Transitions
• Company: Royal Hardwood Floors
• Who we are: Ottawa’s only third generation hardwood specialist, serving homes, embassies and heritage spaces since 1922
• Relevant services: Site measuring, custom milled reducers and thresholds, floating and glue down transition design, expansion detailing, screen and recoat
• Service area: City of Ottawa and surrounding communities
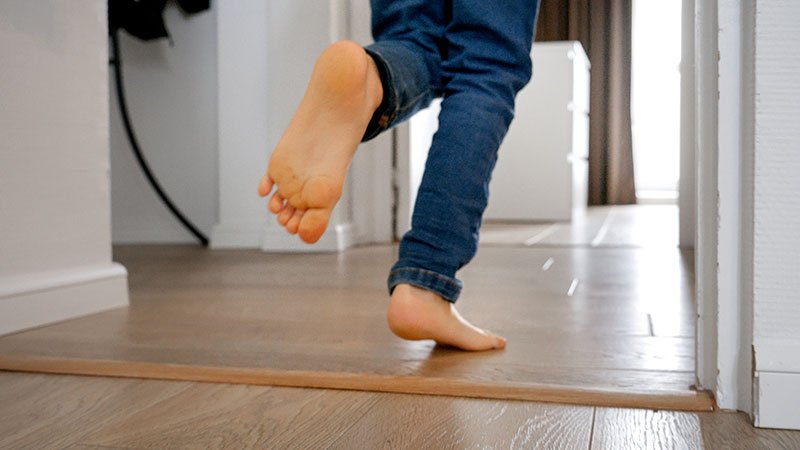
A hardwood field can look flawless inside a room yet fail at the line where it meets tile, carpet or stone. That meeting line is where toes catch, edges chip and seasonal movement shows itself. Beautiful floors end well. Use this homeowner guide to plan flush reducers, T molds and expansion allowances so every doorway reads finished and safe.
I. Begin With The Heights, Not The Hopes
Before you choose profiles, measure actual finished heights at every transition.
• Hardwood thickness including underlayment or adhesive bed
• Adjacent surface thickness, such as tile plus thinset, carpet plus pad, luxury vinyl with pad, stone on mortar
• Subfloor changes at the doorway, such as plywood to concrete or shims added during renovation
Write the numbers. Your goal is a transition that is safe underfoot, honors expansion and looks intentional.
II. Flush Reducers: The Elegant Way To Step Down
What they are
Flush reducers taper hardwood down to a lower surface so feet glide rather than stumble. They sit level with the field and descend in a controlled slope.
When to use
• Hardwood to low profile tile or luxury vinyl
• Hardwood to stained concrete at entries
• Long, open plan edges where a proud molding would look busy
Craft notes
• Mill reducers in the same species and finish for a continuous look
• Anchor to the subfloor, never to a floating field, so the wood can move
• Ease the upper edge with a small radius to resist chipping from vacuums and strollers
• Keep the slope generous enough for socks to grip, crisp enough to read like joinery
III. T Molds: Let Floating Floors Breathe
What they are
A T molding straddles two equal height surfaces and covers the expansion gap while both sides move. Think of it as a polite handshake between rooms.
When to use
• Floating hardwood or click engineered at doorways and long runs
• Between hardwood rooms that expand independently due to light or HVAC differences
• Across material changes where heights match
Craft notes
• Seat the T leg in a track or adhesive bed that is attached only to the subfloor
• Align grain direction with the primary room for visual calm
• If you dislike the break and your floor is nail down, a flush spline joint can work only when layout and movement allow it. Floating floors still need a true expansion break
IV. Classic Thresholds And Saddles: Tough At Doorways
What they are
A threshold or saddle is a solid piece, often wider with gentle bevels, that sits in the doorway and absorbs abuse from sweeps, salt and daily foot traffic.
When to use
• Exterior doors, mudrooms and garage entries
• Bathrooms and laundry rooms where a subtle water break helps
• Heritage homes where a solid saddle suits the millwork language
Craft notes
• Seal all faces including the underside and end grain
• Keep the top nearly flush on the hardwood side and let the bevel fall to the lower surface
• Where water appears, use a tiny back bevel toward the wet side so moisture does not perch
V. Expansion Allowances: Make Space For Seasons
Wood moves. Plan for it and hide it.
• Leave a clean expansion gap at walls, fireplaces, built ins, stone hearths and tile edges. Cover with baseboard and shoe or a flush architectural detail
• Floating systems need real breaks at strategic distances and room transitions
• Nail down floors span longer, yet complex plans still benefit from discreet breaks
• Never pin the floor with fasteners through reducers or thresholds. Fasten transitions to the subfloor, not to the moving field
VI. Carpet, Tile And Stone: Getting The Details Right
Hardwood to carpet
Use an end cap or baby threshold that captures the carpet edge on a tack strip. Protect the carpet from fraying and keep a gentle height handoff. Aim for a firm tuck with no backing exposed.
Hardwood to tile
If heights are near level, choose a flush reducer. If tile sits higher, consider a slim metal profile at the tile edge with a low hardwood ramp. Keep grout lines back from the transition so edges do not crumble.
Hardwood to stone
Stone wins on hardness, so protect the wood. Undercut the stone edge when possible and tuck the hardwood with slight relief. Cover with a flat metal strip or a crafted wood threshold that allows hidden movement.
VII. Stair Landings And Nosing Joins
Stair edges are where missteps happen and finishes fail first.
• Use a flush or overlapping stair nose that locks into the flooring system yet leaves the field its expansion room
• Keep nosing projection disciplined so toes do not roll
• If a runner meets the landing, set the transition line square and centered to avoid an optical jog
VIII. Metal Profiles: When Durability Must Disappear
Premium powder coated or anodized profiles can vanish visually while solving tough conditions.
• Low L profiles protect tile edges where height differences are tiny
• Ramp profiles resolve larger tile to wood deltas without bulky wood reducers
• Match nearby hardware or aim to vanish into the floor, for example matte black on dark stain, champagne or bronze on mid tones, soft white on pale oak
Use metal in wet or commercial leaning zones, then return to wood in living areas for warmth.
IX. Floating, Glue Down, Nail Down: Methods Change The Math
• Floating floors require expansion breaks at doorways and corridors. Transitions must not trap the field
• Glue down floors behave quietly when adhesive and subfloor are within spec. Transitions can be sleeker, yet avoid fastening through the field
• Nail down allows the most flush millwork, yet seasonal movement still exists. Leave the gaps and hide them cleanly
X. Light, Safety And Accessibility
• Keep transitions low and smooth so feet and small wheels pass without drama
• Provide visual contrast where light is dim or residents are older. A subtle shade shift at a threshold helps the eye judge the step
• Avoid proud edges that chip and trip. If the adjacent surface is higher, solve it with a longer, gentler reducer rather than a short steep piece
XI. Finish, Color And Longevity
• Finish transitions with the same system and sheen as the field so you do not create a shiny strip under winter sun
• On dark stains, a slightly darker reducer hides scuffs. On naturals, match tone closely so the line disappears
• Seal cut edges inside the doorway to guard against moisture and cleaners
XII. A Simple Planning Checklist
• Measure finished heights for every transition
• Decide the profile by pair, hardwood to tile, hardwood to carpet, hardwood to stone, hardwood to hardwood
• Choose species and finish to match the field
• Confirm fastening to the subfloor only, never pinning the field
• Verify expansion allowances at all fixed points
• Walk the plan in socks. If it feels safe and quiet, it is probably right
XIII. Why This Matters In Ottawa
Small details protect large budgets. A proud edge chips, a trapped floor swells, a tight fit against tile telegraphs stress when humidity swings. Thoughtful transitions keep your investment safe and make rooms feel tailored from door to door.
Since 1922 our family has finished floors across Ottawa homes, embassies and heritage interiors. We mill reducers in matching stock, set T molds with breathing room and leave every doorway quiet to the eye and sure underfoot.
FAQs
What is the safest transition for hardwood floors in Ottawa homes?
Flush reducers and properly installed T-molds are the safest options. They create smooth height changes, reduce trip risk, and allow hardwood to expand and contract through Ottawa’s seasonal humidity swings.
When should I use a T-mold instead of a flush reducer?
Use a T-mold when both flooring surfaces are the same height and at doorways where floating floors need an expansion break. Flush reducers are better when stepping down to a lower surface like tile or concrete.
Do hardwood floor transitions need expansion gaps?
Yes. Hardwood must be allowed to move. Transitions should always be fastened to the subfloor, never through the hardwood field, so seasonal expansion does not cause buckling or squeaks.
What causes chipped or broken floor transitions?
Common causes include proud edges, steep slopes, incorrect fastening, and using profiles that are too thin for the height difference. Proper measuring and custom-milled transitions prevent these failures.
Are wood or metal transitions better in Ottawa homes?
Wood transitions blend seamlessly in living areas, while metal profiles perform better near tile, exterior doors, and wet zones. The best choice depends on traffic, moisture exposure, and finished floor height.
Include Transitions In Your Plan
We will measure every doorway, specify profiles, mill matching reducers and thresholds, and set expansion details that keep your floors safe, elegant and ready to move gracefully through Ottawa’s seasons.
Serving Ottawa since 1922 as the only third-generation hardwood specialist in the region.